


Tips for buying wall moulding
- Sara Chiodo

- Mar 1, 2023
- 3 min read
Have a DIY accent wall planned?? We are currently working on wainscoting our dining room which is the second time we've installed moulding in our house. The first time was when we did our living room, and I wanted to share some tips I've learned along the way!
8 tips for purchasing wall moulding:
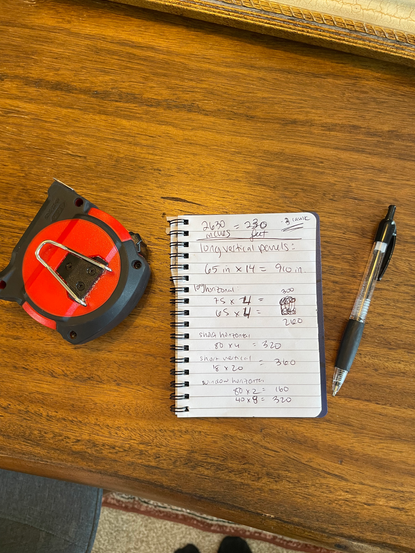
1. First, you need to plan out and measure your space. I recommend using green painter's tape to plan out where you are going to install the moulding. I know you see blue tape shown below, but it doesn't stick well compared to green painters tape (trust me!). Don't forget to bring a tape measure to the store!


2. Budget for the cost (it can add up quickly!). The moulding for our living room cost almost $400 and I was so shocked how quickly it added up. While DIY can certainly be cheaper than hiring out, it's still a cost to plan and budget for. We were much better prepared for the cost when we decided to add moulding to the dining room. Again, the moulding cost us about $400.
3. Plan to purchase 10% more than you measured. This accounts for mitered edges and also if you make any mistakes. *Tip: Once you get to cutting your wood for install, start with your longest mouldings first. That way, if you do make a mistake, you can still use the moulding on a shorter edge.
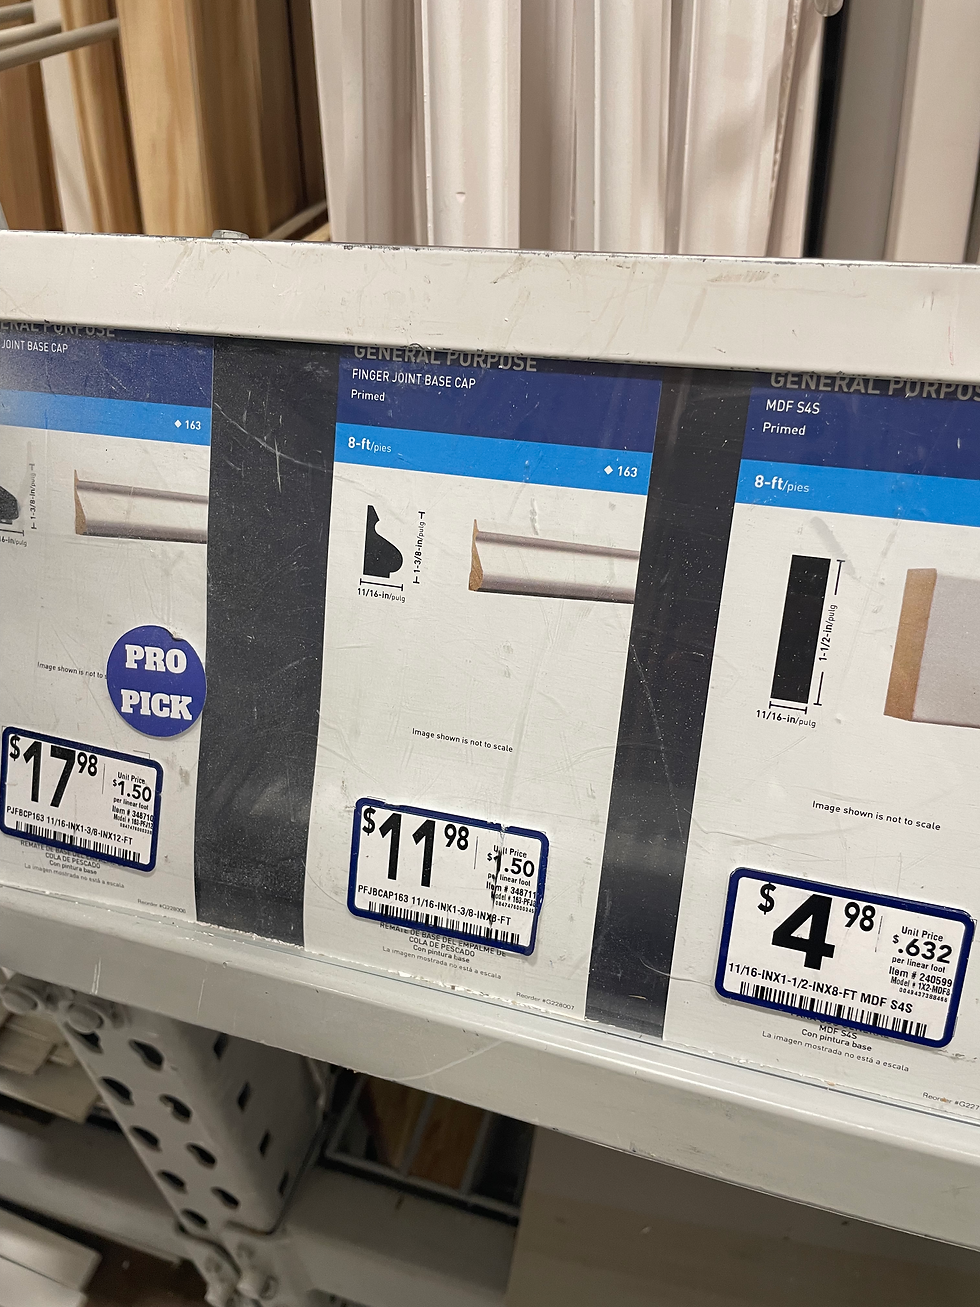
4. Buy primed moulding if you plan to paint. For our projects, I used a primed finger joint base cap that was on the cheaper end. There are tons of moulding options! You can be as fancy or as basic as you'd like. There are so many styles, materials and sizes to choose from.
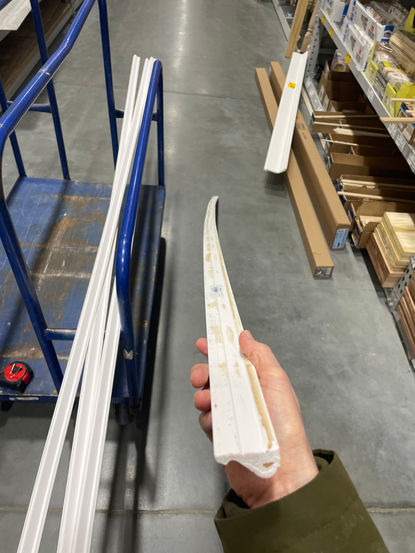
5. Check for bowed or warped boards and avoid purchasing those. When I went shopping for our dining room moulding, I probably spent 30 minutes just sorting through the mouldings. It's helpful if you hold it out in front of you and look down the length of the moulding. That will help you identify any obvious bowing. Know, that it might be still be hard to find moulding (especially the cheaper priced ones), that are perfectly straight. But avoid the extremely warped ones if you can.


6. Allow time for sorting through moulding and cutting them down. When we purchased moulding for our living room, we went to Home Depot and only found 12 foot moulding that we liked. For that reason, we had to cut it ourselves in the actual store. This is an example of why it's helpful to bring a tape measure! For the living room, Lowe's had 8 foot mouldings we liked, so we didn't have to cut it store (which was SO nice!).
7. Buy the longest mouldings that will fit in your car. Know that you can unroll your windows and stick the mouldings out to allow for more length. Some mouldings are flexible too! So you might be surprised by what you can fit. Keep this in mind when (and if) you have to cut in store. We purchased 8 foot mouldings which were able to fit in our Honda Pilot.
8. Buy the rest of your project supplies while you're there. Here's a list of what we needed:
brad nailer and nails
paintable caulk
level
green painters tape

Now that you've got all of your supplies, you're ready to move onto the next part - install!! Did I miss anything you might want to know? Leave a comment! Follow me on IG or TikTok @functionalforyou for more on our dining room wainscoting project.


Comments